Christmas is a very popular time of year for photo enthusiasts to brave the cold and head out to capture the best displays that the season has to offer, but in some cases you don’t have to freeze!
A very popular spot in Toronto is the Eaton Centre atrium where every year millions of visitors are treated to different displays often crafted by graphic design companies that are paid to create the colorful Christmas installations by Cadillac Fairview.
Now I know what your thinking, malls are private property and they’re often not fans of people wandering around with cameras. This was true for the Eaton Centre until about 2006 when camera phones began to proliferate the market. I’m not sure exactly when mall security in the Eaton Centre gave up chasing people with camera phones but by 2009 they did not seem to care anymore. Security still chased people with large cameras but that changed sometime in 2012. Since then I’ve seen many hundreds, dare I say thousands of photo enthusiasts running through the mall with gear ranging from your run of the mill $20 vintage Leica to those with no less than $5000 of equipment dangling around their neck.
So if you want to beat the cold, do some shopping, enjoy a latte, tell everyone in the Apple store how much of a rip-off the MacBook Air is and fight hipsters to the death while snapping some photos of Christmas art installations then check of the Toronto Eaton Centre.
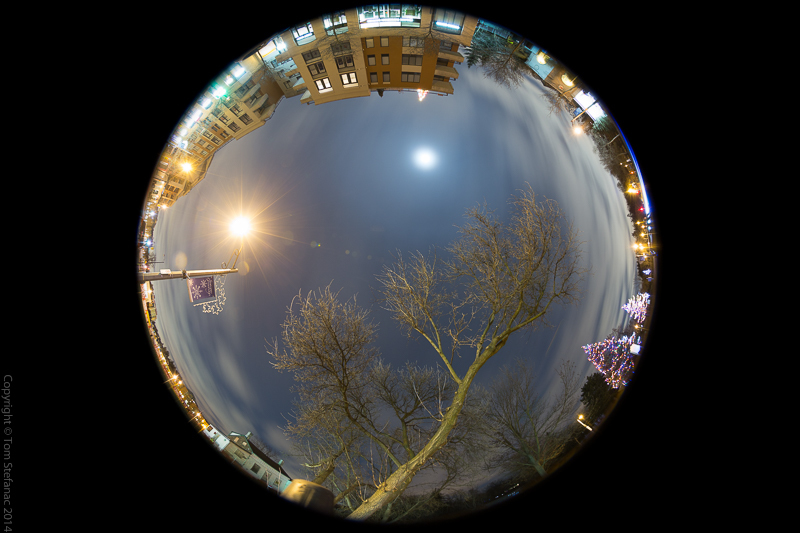
180 degrees of Night Sky – Fisheye lenses were first used as meteorological tools to see the sky
When it comes to fisheye lenses there really are three possible things that will cross people’s minds. Some will think (1) it’s a wonky, artsy, novelty lens that can create some neat images but that’s about all it can be used for (2) it’s a tool for a specific purpose such as the task of capturing the sky in its entirety from horizon to horizon in the name of science (3) it’s a waste of money and produces distorted, useless, pictures that get boring fast.
Let’s be fair, it’s not your everyday lens that you would use for portraiture or anything really requiring asymmetrical linear pictures all the time. But it is a special lens that can be used with just as much versatility as a 16-35mm or 24-70mm. In fact, I would argue, it is even more versatile than a super telephoto above 400mm. Sure, if your shooting birds in flight you need something with range and if your shooting weddings the 24-70 is your primary lens and the 70-200 is your secondary workhorse. If your big on landscapes and getting up close and personal then the 16-35mm is your tool, but the 8-15mm Fisheye has its place.
You can use the 8-15mm for funky wedding shots, or to capture the entirety of a banquet hall or stadium in one swoop. You can use it for landscapes where you center the horizon to eliminate the barrel distortion or use the barrel distortion to amply curves already present
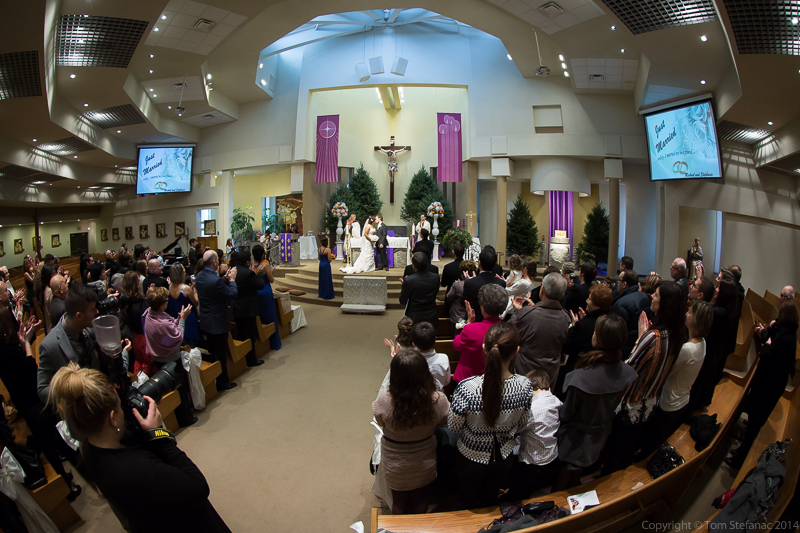
Mike and Stephanie’s Wedding – 15mm @ F4
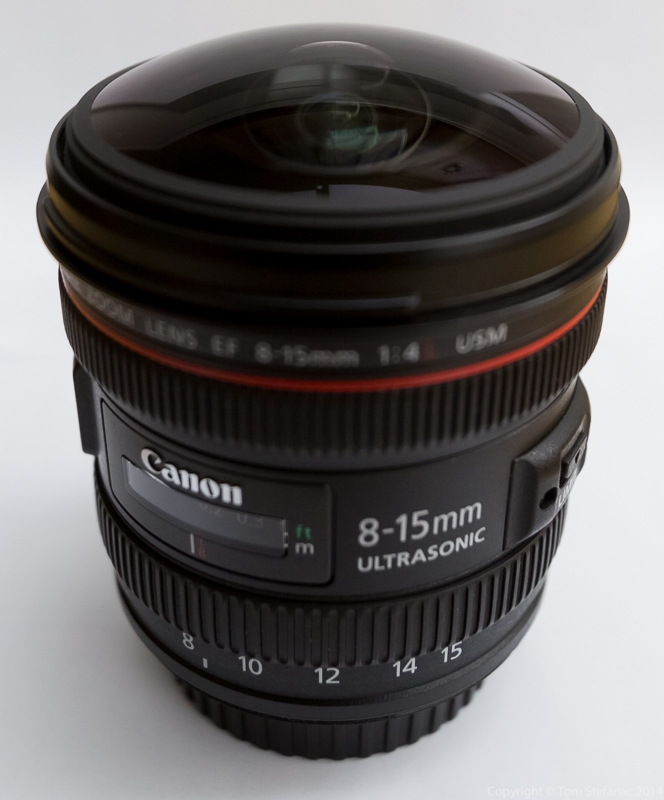
without the observer noticing. You can even use it for portraiture to create a large head, small body effect, large head no body effect or regular body, round world effect. What sets the 8-15mm apart from all other lenses is that you have two options, a picture that fills the frame, or a circular image with black vignetting.
To understand how to best use Canon 8-15mm fisheye, I’ve put together several comparisons.
Fisheye lenses are the widest of all lenses boasting a 180 degree field of view, and while the Canon 8-15mm fisheye is technically a zoom lens, all that your really doing is cropping the image within the lens. If you want to zoom, you’re going to have to zoom with your feet, the same way you zoom with a prime lens by walking towards your subject.
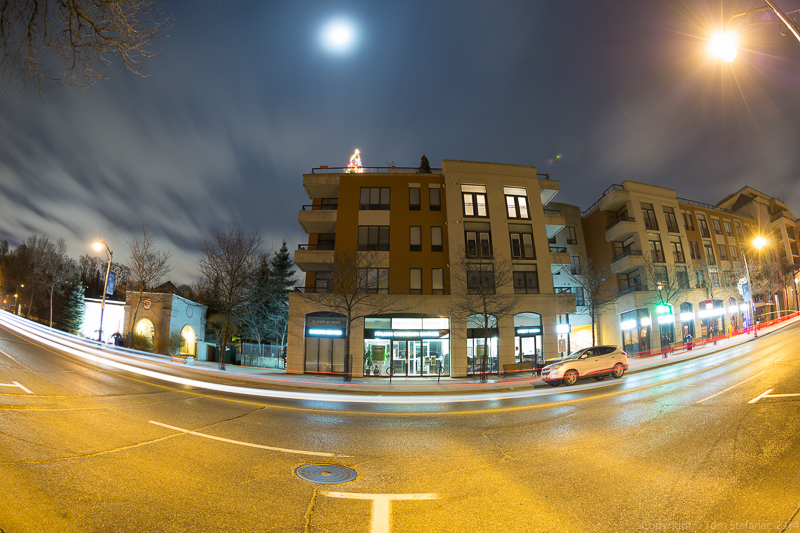
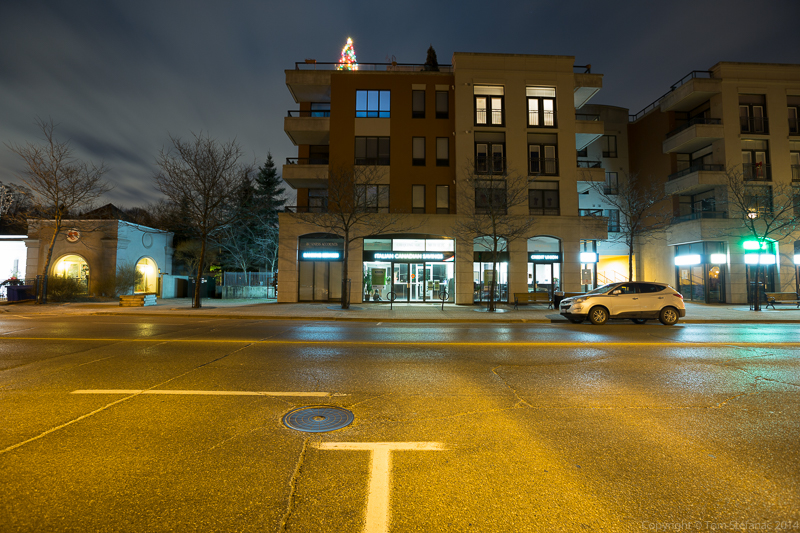
The beauty of having such a wide field of view is that distant objects can be brought together easily. Below, you’ll see two images showing a grouping of buildings. The first, taken with the 8-15mm fisheye and the second with the 16-35mm wide-angle lens . You can see just how much a difference a few millimeters can make.
15mm F4 ISO160 Fisheye
16mm F4 ISO160 Wide Angle
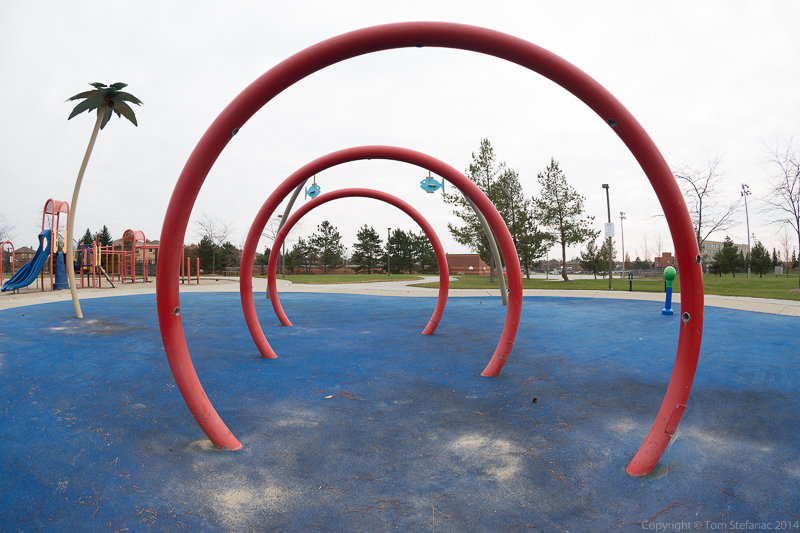
The problem with the fish-eye is the barrel distortion, but this can be corrected or at least limited by placing the horizon or central subject area in the center of lens of leveling the horizon. Below, you can see a picture of a children’s splash pad with three circular rings. Very little distortion is visible but there is some bowing on the extreme left and right sides of the image. However, for most observers, this is easy on the eye and the image looks natural with an extremely wide 180 degree field of view. With completely natural environments that are devoid of any right angles or perfectly linear structures, any distortion is even further reduced and that’s where the power of a fisheye lens can be realized for landscape photography.
Playground – 15mm @ F4 Fisheye
EF 8-15mm f/4L Fisheye USM
There is one critical problem that emerges with this particular Fisheye lens. Because the lens bows out, there is no possibility to use a filter to protect the lens beyond using the included Canon lens hood which only works down to about 10mm after which the hood becomes visible in the images captured. This problem not only creates a protection issue but also means filters are not compatible and cannot be used. This is especially problematic when you want to use graduated ND’s to balanced out highlights or polarizers to pull clarity and tone out of the sky or water. That means your limited to HDR’s or forced to underexpose a landscape scene and push the shadows. Because of this, extreme exposures or even exposures where the sun is too hot (bright) means compensation can be a problem and balancing exposure in the image naturally (without any digital or analog modifications) is very difficult or altogether impossible.
8mm Fisheye
16mm Wide Angle
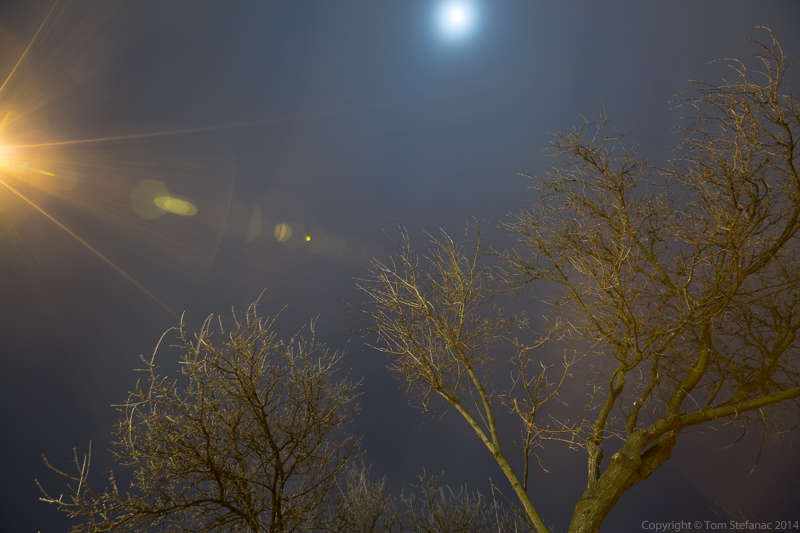
Despite a lack of filters, there are many opportunities that the Canon 8-15mm can generate which simply don’t exist with any other lens. Take the above short of the sky, you can see the circular fisheye image is far more appealing and gives the tree a reaching over effect helping to balance the moon, building and other elements of the sky and horizon. The fisheye gives this shot life. If you look at the exact same shot taken with the Canon 16-35 at a full 16mm you can see the horizon is missing, the tree is barely reaching over, the moon and street lamp feel oddly placed and over all it’s a bland unbalanced image with little if any appeal.
Below is a small sample gallery of images taken with the Canon EF 8-15mm f/4L Fisheye USM Lens on a 5DMKIII body & 650D APS-C body. These images have not been edited or altered.
I’ve got to say ever since getting the new teleconverter extender for the 70- 200mm lens I’ve really been itching to use it. The Air Show was a good opportunity but it was a bit of a failure on my part because I wasn’t prepared with my batteries.
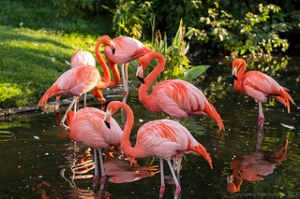
Brightly coloured American Flamingos
In August, my girlfriend and I had agreed that we were going to go to the Toronto Zoo but unfortunately mechanical issues with my car forced us to change our plans. We then decided on date in mid-September which was good for both of us, as it turns out the weather on this particular day was perfect, the sky was blue and there was plenty of bright sunshine with virtually no cloud cover and it wasn’t overly hot so the animals were active.
I was super excited because not only is the zoo interesting from an educational standpoint but many of the animals are exotic and have brightly coloured fur and feathers.
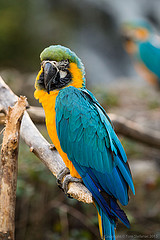
Blue and Yellow Macaw
The first problem that I ran into almost immediately was that I tried to use teleconverter all the time even when it was utterly unnecessary. I had to kick myself in the head a few times to actually detach it from the 70 to 200 mm lens. Once I removed the teleconverter I was able to lower my f-stop number but still keep my subject matter crisp and in focus and I really did learn where to use the teleconverter and where not to.
While the outdoor exhibits were relatively easy to shoot they did provide their own unique challenges, for example some of the animal enclosures have fairly tight metal meshing which meant I had to get the lens right up to the fence to see through the metal otherwise it would’ve provided for an ugly photo.
Some of the outdoor enclosures were also heavily shaded and some of the animals such as the Tigers wanted to sit in the shade. Not only did this put them relatively far away from me but it also meant I would have to use a much slower shutter speed with the extender while still trying to keep everything in focus without shaking the camera and creating motion blur.
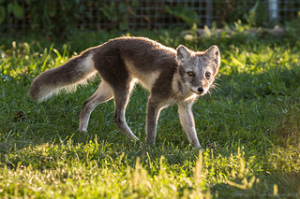
Arctic Fox – taken looking through metal fencing & thick glass
Lastly some of the outdoor exhibits had very thick glass which naturally distorts light and also creates a very hazy look to the photos. The only way around this was to look for parts of the glass that were clean (no dirt) and focus the best shots looking straight through the glass at a 90° angle.
Without a doubt the indoor exhibits at the zoo proved the most challenging to photograph. Many of the exhibits had a mixed system of plexiglass and metal fencing somewhat obstructing the animals and the lighting was also very dim compared to the outdoors. One of the exhibits which housed naked mole rats and a number of various types of bats had virtually no light; I had to force the camera and lens to its limit in order to achieve usable photos.
In another case the lemurs were relatively easy to photograph since they weren’t obstructed however due to lighting conditions I was forced to use a lower shutter speed and unlike the other animals these guys were just crazy hyper, they would not stop moving for one second, I think I took about 200 photos only to achieve six or seven which are actually usable that I was happy with.
I had some similar frustrations with the North American river otters, between distortion from the glass barrier and the fact that they were moving at what felt like supersonic speeds underwater I had to take a plethora of images only to achieve a handful that I was satisfied with.
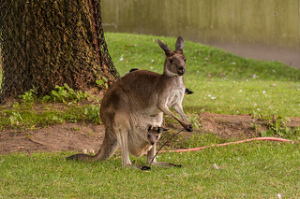
Mother Kangaroo & baby Joey in her pouch
Out of all the exhibits at the zoo that I saw one of my favorite moments was at the end of the day. The zoo was technically closed and my girlfriend and I were slowly making our way out when we stopped by the Australian Kangaroo exhibit. I noticed a rather large kangaroo standing not overly far away and I began taking photos and realized when I was reviewing them that this kangaroo had a baby Joey tucked into her pouch. It was one of those photos that simply make your heart melt.
All in all I had a great time at the Toronto Zoo it was fun working with the numerous challenges presented but it was also great to see all these animals out and about and make use of my photographic tools to their fullest extent. The Zoo is also a world class facility, all the animals are well taken care of and the zoo grounds are massive so you get a good workout too!
 Christmas is a very popular time of year for photo enthusiasts to brave the cold and head out to capture the best displays that the season has to offer, but in some cases you don’t have to freeze!