The Scarborough Bluffs at Sunrise

Scarborough Bluffs Sunrise by Vaughan Weather

Looking through some of my older images yesterday I found two photos from the Scarborough Bluffs.

For those who might be wondering, the Bluffs are a natural geologic cliff feature on the east side of Toronto primarily composed of sand and in some places leading to a 90 meter drop straight into Lake Ontario. The bluffs were a product of the last ice age and the draining Don River. They look very similar to the limestone cliffs of England in some places because of their white appearance.

One of the best overlooking shots of the bluffs can be achieved from the foot of Cecil Crescent where it officially ends at Scarborough Bluffs Park. For other perspectives, specifically looking up from the foot of the bluffs, Brimley Road becomes Bluffers Park Rd at the edge of the lake; from there it’s a 10-15 minute walk west to the Cathedral Bluffs, the most stunning vertical piles of sand and cliffs.

I’ve seen many brave photographers climbing, cliff hanging and boating up to the edge of some of these pillars. I’ve also seen the “less brave” using drones, kites and other tools to achieve what I can only image are some spectacular images.

My images overlooking the Bluff’s are a product of circumstance and opportunity rather than planning and choice.

Scarborough Bluffs by Vaughan Weather

I was there to cover a news story about a man who had fallen down the bluffs to his death (yes that happens semi-frequently) and only the week earlier a group of teenagers who tried to descend the bluff became trapped and spent the night. People often make the mistake of trying to descend some of the cliff sides, only to realize going up is often harder than heading down and this is further complicated by dew and overnight moisture which makes the grasses very slippery.

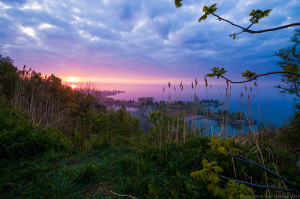
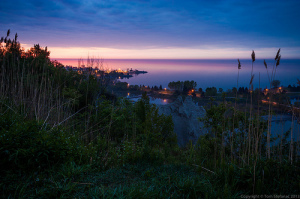
While I was wondering around just outside a small portion of the park which was taped off for the crime scene, I saw the glow from the soon to be rising sun in the east. I quickly knew I had an opportune time to grab some images of the sun. A low hanging stratocumulus deck reaching out to the horizon provided a wonderful converging line to focus attention on the sun and offset the blue sky. I also used the dense plant life around, most of which was green to balance the perspective and offset the strong red/magenta and yellow/orange hues from the sun.

The end result was more tropical than I could have imagined and provided a full pallet of subtle colour ever increasing towards the sun.

As crazy as it sounds, I’ve actually taken a few images from this general area in the past, none of which I really cared for. They were either later in the day or evening images where shadows from the setting sun washed out the shoreline. So, the lesson learned here is to take full advantage of any photo opportunity and southeast facing cliffs look best at sunrise with lots of colour!

I would like to return in the future on another hazy morning and see what I can gather from the ground for an alternative angle.
Cellular Sunrise

Cellular Sunrise by Vaughan Weather

You know what they say, odd numbers look good.

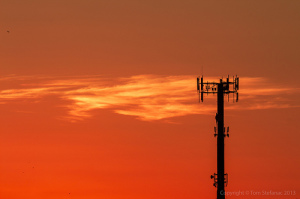
I did not even realize it but this lone cell phone tower is full of odd numbers, it has 3 sections of antenna, all with odd numbers!

There are 7 antenna on the top, three in the middle and 3 on the bottom (the dome at the bottom is a microwave site).

Anyhow, the main purpose of this photo was two fold. Firstly, I was waiting for the sun to rise and looking for a good photo, this tower served to fill the predawn sky and create contrast.

Second, it allowed me to test my Canon EF 2x III Extender at maximum push/zoom with my EF 70-200mm f/2.8L IS II USM lens.

And the results are in!

Not bad eh? I would say everything is sharp, I was shooting F10 (F8 without the extender) which seems to be the sharpest point of the lens and found a good high contrast object to see if there was any nasty aberration or softening.

As you can guess, there was none, just a nice clean image.

To that effect, I also wanted a summer sky since it is still summer and will be for another week. This will give me something pretty to look at come December!

Testing the Canon 2x EF Extender III (Teleconverter)


Canon EF 70-200mm f/2.8L IS II USM @ 200MM Test With Canon 2x EF Extender III (Teleconverter)Canon EF 70-200mm f/2.8L IS II USM with a Canon 2x EF Extender III (Teleconverter) mounted on a Canon Rebel T4i / 650D bodyCanon EF 70-200mm f/2.8L IS II USM @ 70MM Test without Canon 2x EF Extender III (Teleconverter)Canon EF 70-200mm f/2.8L IS II USM @ 70MM Test With Canon 2x EF Extender III (Teleconverter)Canon EF 70-200mm f/2.8L IS II USM @ 200MM Test without Canon 2x EF Extender III (Teleconverter)


Moments ago (literally at 12AM Sept 1st, 2013) I acquired the flagship Canon 2x version 3 teleconverter from a friend who recently visited New York on a trip and was kind enough to purchase and bring it back for me.

These are the first test images I’ve taken to test the clarity.
The general rule is that for the best picture the camera should be at least two stops above the teleconverter, so for example my F2.8 lens automatically becomes an F5.6 lens with the teleconverter connected. I would then add two additional stops bringing the number up to ~F8 for maximum clarity.


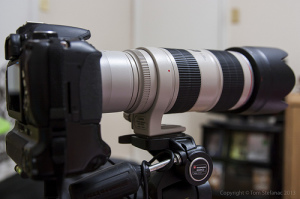
Canon EF 70-200mm f/2.8L IS II USM with a Canon 2x EF Extender III (Teleconverter) mounted on a Canon Rebel T4i / 650D body
The new extender is shorter than the version two model with the biggest difference being the ability to send data about the lens through the teleconverter while the teleconverter add it’s own data into the mix. This appears in the EXIF information in the lens model field as EF70-200mm f/2.8L IS II USM +2x III indicating the lens is being used with the teleconverter. In the lens info field, the multiplication factor from the teleconverter appears as 140-400mm f/0. All other tidbits of data remain the same (f number, camera mode, focuz, etc etc).


Canon EF 70-200mm f/2.8L IS II USM @ 200MM Test With Canon 2x EF Extender III (Teleconverter)


Above, this photos is the lens at it’s maximum zoom of 200mm using the teleconverter which makes it a 400mm equivalent image. Since I’m shooting on a T4i which has a 1.6X crop factor, this image would then become the equivalent of a 650mm zoom if the T4i were using a full frame sensor.

Seeing as I literally just took these test shots, I notice very little or no deterioration of the image which to me seems to be a massive step up from the poor reviews and aberration / softness that the version two extender received.

A full set of images with and without the teleconverter with the 70-200mm lens at minimum and maximum zoon are available here for your viewing.

http://www.flickr.com/photos/vaughanweather/sets/72157635326592584/


I’ll post more images in the coming days once I get a chance to really test this new toy out!