Simulating Medium & Large Format Landscape Photography

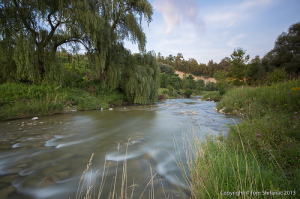
Humber River During Late Summer by Vaughan Weather

Do you ever see those wonderful landscape photos with the bright vibrant colours, the smooth silky water and soft moving clouds?

Well chances are you have and these photos have traditionally been the domain of medium and large format field cameras using a bellows and rear plate which holds a piece of sheet film. The advantage these cameras have is that they can shift and tilt which corrects perspective, they have super small apertures, sometimes as high as F/60 giving an incredible and crisp depth of field. The downside is that that they are big, slow to setup, a tripod is necessary and you really need to know what you’re doing because film isn’t cheap and you won’t know what you have until well after the fact.

That said, in my opinion everything about medium and large format makes it special and often the results are well worth the effort needed!

In today’s digital world, you can simulate large format images but it takes patience and even more time to setup and go through the process than it would with a 4×5 box camera.

The super high apertures associated with medium and large format field cameras have the effect of not only producing super sharp images but also serve to slow down time immensely and what I mean by that is they will require a 1 – 4 second exposure (or longer) even in full daylight. This allows water and clouds to smear into a silky looking surface which is highly desirable.

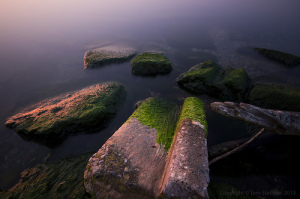
Moss Covered Stones

In order to achieve the same effect with a digital SLR you need neutral density filters and good strong ones. My favourite ND is the B+W ND110 which knocks down light by about 11 f-stops. If you shoot at F/11 with the filter you effectively now have an F/22 setting and this can turn a full daylight exposure that would be 1/500th of a second normally into a 3 or 4 second exposure. This will allow you to get the desired silky effect that has been a staple of medium format landscape images for over a century.

In order to achieve the same level of sharpness, you need to take multiple images at slightly different focal lengths; you’ll need at least 4 images using an F/22 setting and 8 images at F/11 from infinity to maybe 6 meters. You can then import these images into an application like Photoshop and have them automatically aligned and then stacked, this process is called focus stacking because only the sharpest parts of the images will be combined giving a near true infinite depth of field.

Naturally between the filter forcing the camera to require a long exposure and having to take multiple images at different focal lengths you can easily spend five or ten minutes just getting one photo that you still have to process which is longer than you would need with a medium or large format camera.
But at the end of the day, as long as you took the time to frame your scene and had patience your end result will certainly be pleasing if not simply impressive!
A Quick Collage

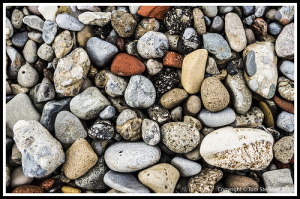
Gravel Collage by Vaughan Weather

It’s easy to ignore the simpler things beneath our feet or above our heads but sometimes a simple pattern on an asphalt road or interlock pathway can make a wonderful photo if framed from above looking down.
In this case, the stone covered shore along Lake Ontario provided me with a wonderful random collage of rocks. I’ve actually taken numerous photos of the ground along this same stretch of shoreline under all sorts of lighting conditions. Generally speaking I find morning/evening and overcast daylight are the best conditions. Full sun works sometimes and can be very useful in creating high contrast images but sometimes it washes out too much detail or makes the image too harsh.

Whatever the case, next time you’re walking past anything, a wall, a fence, the ground, a roof, just take a second and stop. Think to yourself, if I took a photo of the pattern or random assortment of pieces composing the whole, would it be a cool photo?

Chances are the answer is yes, and you might just surprise yourself how you can find great photos almost anywhere!

Instant Film Polaroid Style

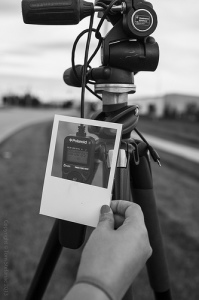
Instant Film by Vaughan Weather

Remember those good old instant cameras? Well, you can still buy them but finding Polaroids instant film is not exactly easy. Sure, once upon a time you could walk into any store and find just about all the film you could have ever wanted.

Today that’s hardly the case but with the internet finding film is about having patience, the patience to find a good reputable distributor and then waiting for it to work through the mail system.

In what was a spur of the moment thought I decided to replicate some picture in picture photography, but Polaroid style. I decided to get my girlfriend who is a very brave hand model to hold a piece of paper in front of my lens. I was hoping to do an 8×11 shot but I did not have any crisp paper with me, instead I found an old white 4×6 wedding invitation. She held the blank side of the invitation towards me; I framed the shot and took it, then I quickly took another without her hand or the paper in the shot. This gave me two photos, one with a clean background and the other with the paper and her hand which would essentially be the picture.

In Photoshop I automatically stitched the two images together using the automated align & stack tool. I then used a layer mask to create a 4×4 square hole in the paper and allow the background layer to burst through. I tweaked the background contrast to make it look like there was a loss in brightness/contrast to get more of a matte look on the paper and make it look like an actual photo of the background. I did want to make the image believable; otherwise it just looked like a piece of paper with a square hole in it (hardly the effect I’m going for).

Seeing as my remote trigger is a cheap 10 dollar Polaroid unit that operates flawlessly I might add, it was only fitting to make this the focus point of the image. Polaroid instant film meets a Polaroid trigger in a digital world.

Maybe next time I’ll bring some empty picture frames with me and see how those images turn out.